.jpg)
Chinoiserie Project Guide
- kilncreations
- Oct 31, 2025
- 2 min read

Thank you for listening to Throwing Shade (& Clay) Episode one: The Women's March on Versailles! Below you can find a guide to how we created our Chinoiserie inspired pieces. Try your hand out at this refined style!
Chinoiserie literally means “in the style of China,” and is, at its most simplistic, a style of art that copies the historic style of Chinese pottery, with depictions of everyday life, stories, and floral themes. The French adapted this style to represent their reality, including native flowers and styles in their artwork. Often featuring cobalt blue artwork on stark white porcelain, this style of painting gained initial popularity in Europe in the 1720’s and experienced a revival in the 1920’s.
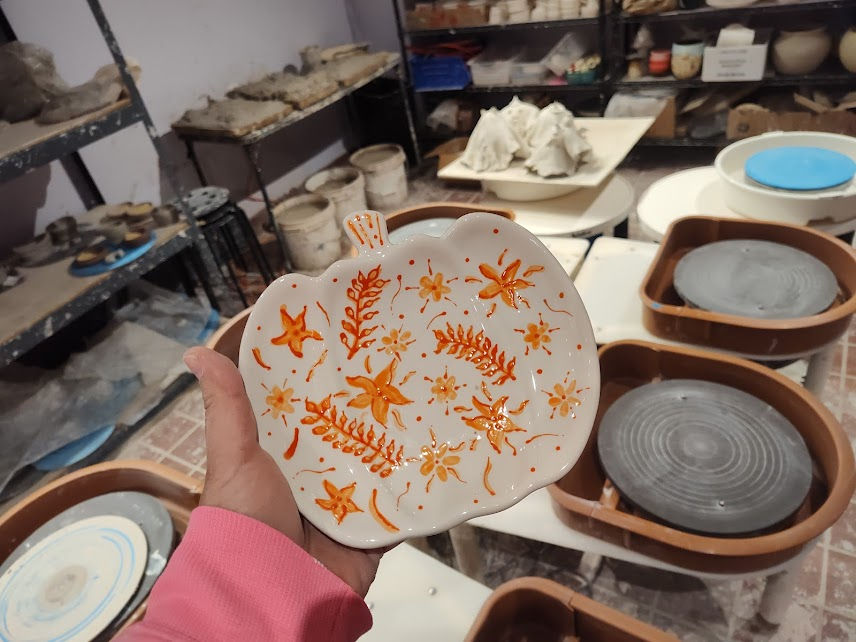
For our purposes, we chose modern pieces and put a fun twist on these with simple, layered painting technique. Karen chose a timely pumpkin plate and layered one orange color in multiple tones, while Louise used two blues on a stoneware vase.
To create your own take on chinoiserie, pop into a local paint your own pottery studio and follow these simple instructions.
You will need:
Shelf ready bisqueware- we used Bisque Imports' Pumpkin dish, #2127, Mayco's Small Pillow vase, and Bisque Imports' Beanie Jar, #551 Round brushes in varying sizes (we suggest at least two) One shading brush of medium size One thin line washable marker (optional) Your choice of paint colors- to duplicate Karen’s orange, she used Mayco’s Orange-a-peel, To copy Louise’s, she used Mayco’s Cara-bein and Moody Blue Clear glaze that fires to your clay’s cone- We use Mayco’s The Clear One A Water Cup A Small Palette
1. Start by designing your layout if you’d like with the washable marker. Draw, trace or use stencils to outline a floral pattern over your piece. We also display a piece with a kiddo’s handprint as the focus. If you plan to do that, leave it for last and just leave a space for it.
2. Water down your chosen color by 75%- so 1 part paint to 3 parts water. Fill in your biggest flowers and designs with this light wash of color, being careful not to drip. Allow to dry
3. Water down the same color by 25%- so 1 part paint and 1 part water. Use this stronger dilution to make broad strokes within the sections you have painted but not overlapping the paint entirely. Allow to dry.
4. Using your chosen color at full strength, outline your designs, and add flourishes to the outsides to give dimension.
5. (Optional) use a darker shade of your chosen color to highlight some portions.
6. (Optional) coat your child’s hand in a thin, even layer of paint and press on to the piece.
7. Glaze the piece with clear glaze.
8. Fire to the cone your clay dictates.
As you can see on our samples, we also used Colorobbia Gold Luster, fired after the glaze firing to cone 019, for the ball on our jar. Have fun with the designs, layering, and styling of your piece and tag Throwing Shade (& Clay) on social media!


Comments